


Putting my degree to work - and because I love a little DIY project
- Jane E. Schwartz
- Oct 31, 2017
- 2 min read
Who knew hiring someone to paint the outside of our little 1860s country farmhouse would result in my taking on an 8-week project to refinish the kitchen? With the house exterior looking so fresh and updated, it made my desire for a fresher looking kitchen that much stronger.
I started with the tired, old butcher-block counters. Stained with years of iron water marks I could never scrub away, they needed a complete refinish. Using a power sander and wood-bleach, I stripped away 30 years of wear and tear, but left some of the wood's "maturity" behind; the house is over 150 years old, so I wasn't going for a pristine look. After cleaning every speck of sawdust from the surfaces, I sealed the wood with a product called EZ-DO, which provides a food-safe, varnique finish (you can't cut on it, which is fine with me).
With the counters looking so nice, the cabinets and kitchen island were that much more of an eye-sore. On to Phase II, refinishing and painting the island and kitchen cabinets.
After some research, I selected paints by General Finishes for my material of choice. GF makes a whole range of finishing products, but their Milk Paint, Glaze Effects and Pearl Effects finishes offered the versatility I needed to try my hand at distressing, glazing and dry-brushing techniques for the first time.
Designed to work together, the GF products were a pleasure to work with. Virtually no VOC, water-based, easy cleanup with soap and water. They dry to the touch in about 20 minutes, and dry to re-coat in about 2 hours (and no, none of the manufacturers I mention here have paid me or provided me with any products).
As I learned in architecture studio, before you attempt anything full scale, you have to work through your design using models. With that in mind, I purchased some 8" cabinet remnants to practice on, and spent a day or so custom-mixing colors and playing with different detailing effects until I settled on the look I was after.
Wanting a pop of color in the kitchen, I custom-mixed a deep turquoise blue for the island. Layered over the same antique white I chose for the cabinets, then distressed and glazed, nine coats later I had the exact effect I was going for. A pop of color, heavily distressed, and perfect for my country kitchen. New hardware completed the look. Before and after photos of the island showcase the new look.


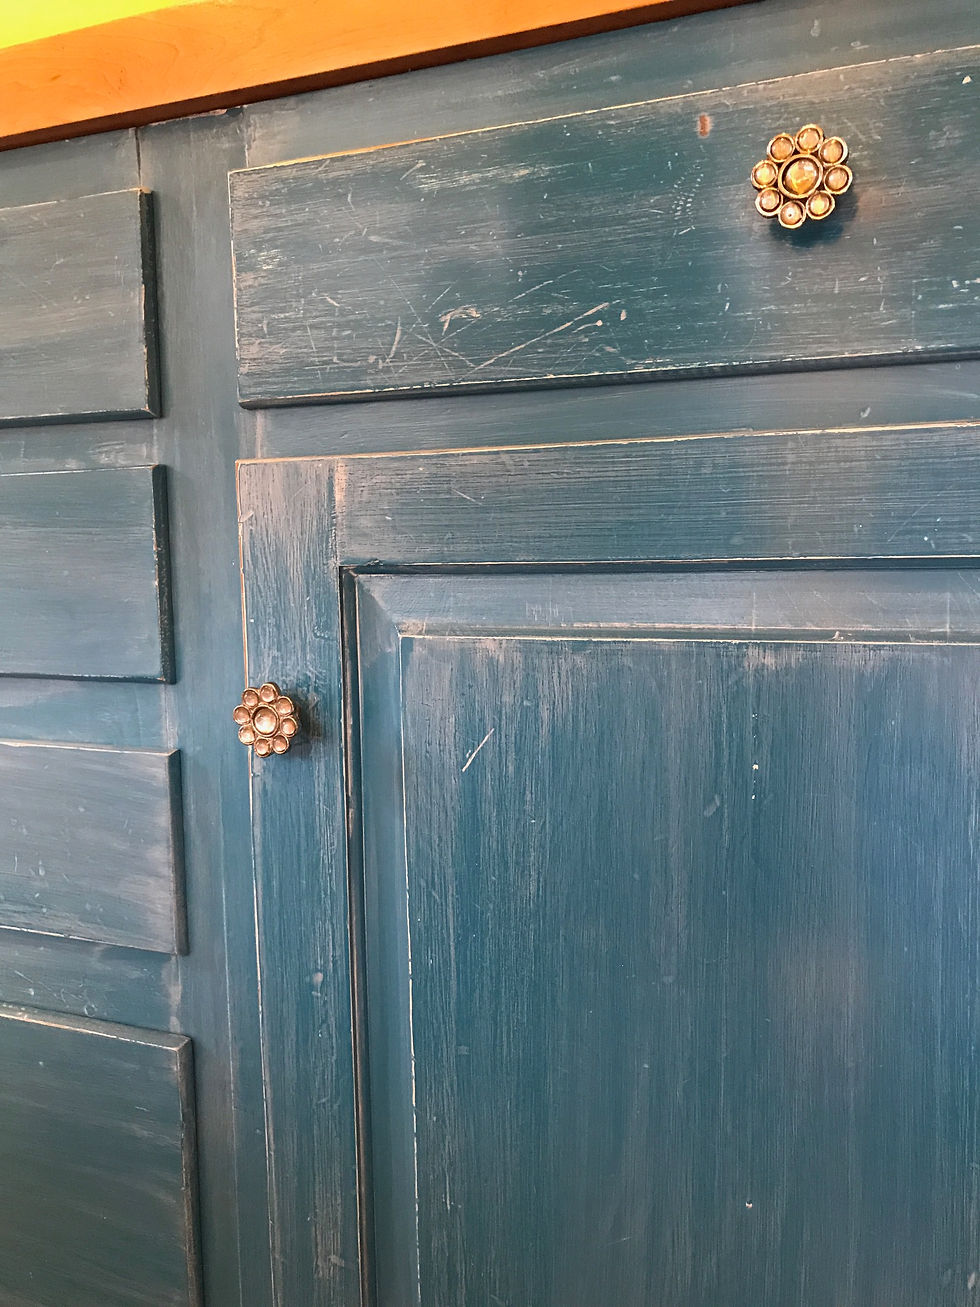
Next came the kitchen cabinets. After removing the cabinet fronts and all their hardware, I prepped, painted, distressed, dry-brushed and glazed to achieve the antiqued effect I was looking for, again using about 9 coats of finish to achieve the look. I kept the hinge hardware, which was already naturally antiqued from age. I changed out the cabinet and drawer pulls to update the cabinets while providing a complement to the look I created for the island. Was very happy with the overall result. My kitchen is now bright with a pop of color, in a style that goes perfectly with my 1860s country cottage.


Comments